You Get What You Pay For
I've been doing a fair amount of metal stamping the last few years. And by a fair amount, I mean that over the weekend I made three stamped cuffs, a pair of stamped earrings, a couple of stamped key chains, and a dozen stamped bookmarks. I know my tools—my metal stamps—as well as I know my best friend.
Take a look at these:
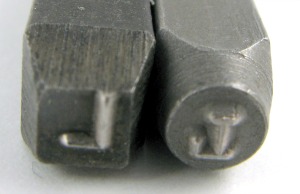
Do you see the difference between these two "L" stamps? Yes, the font faces are different, but it's actually the placement of the letter on the bottom of the stamp that is the most aggravating difference.
On the left is the cheaper set. Notice that the letter "L" is not perfectly centered, but actually touching one side. Every letter in that stamp set is not in the same place on the end of the stamp. This means that even if you hold each letter stamp in the exact same position, the letters will not be lined up.
In contrast, in the more expensive set on the right, the letter "L" is in the center, as are all the other letters. It is a breeze to make the letters line up with this second set.
It's not necessarily bad to buy some inexpensive tools if you're not sure whether you're in it for the long haul or not. If I stuck to just making a few gifts for family and friends instead of opening a handmade shop, I'd probably have been perfectly happy with this first set. But it is a great example of "you get what you pay for."
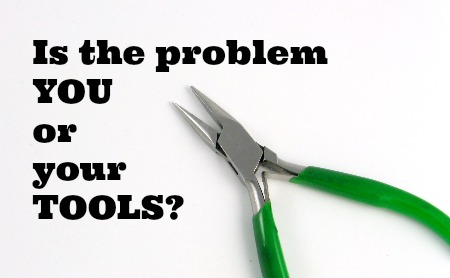
A Poor Workman Blames His Tools
If you're really good, you can compensate for poor tools. With my cheaper set, I've memorized which letters are not arranged precisely and can adjust my technique to compensate. But while it's possible, it's not necessarily the best use of my time. If I use my more expensive set, I can concentrate more on the layout and design of the finished piece and less on holding each individual stamp in the peculiar way that I've memorized.
Of course, this problem with tools is not unique to stamping. As I mentioned in Unexpected Findings, some cheaper round-nose pliers have tips that are more oval than round. You're going to be continually disappointed trying to perfect your round loops if you're using a tool that could never make a completely round shape to begin with.
It's not always a case that more expensive tools are automatically better. I love my cheap hardware store hammer for texturing metal and don't see a need to buy a fancy $100 version to use for that. It's all about the best tool for the job and the best one for you at this time.
If you're getting frustrated with your jewelry making, ask yourself, Is it me or is it my tools?
Recommended Reading
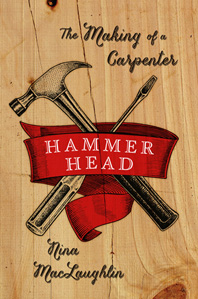
If you're interested in tools and the art of making things, you might enjoy a book I just finished reading, the memoir Hammer Head: The Making of a Carpenter by Nina MacLaughlin. A former journalist, Nina ditched her desk job to serve as an assistant to a female carpenter even though she had no experience at all. Each section of the book is titled with the name of a tool that carpenters use. I enjoyed the authors' comparisons between writing and carpentry, which I found true to my own experience. She also has a lot of interesting observations about tools. Here's one of my favorite quotes:
"I took a deep breath, knowing that this first hole was the first chance to make a mistake. To look is to keep it perfect in your mind. To take the tool to the wood is to open yourself up to error."
If you substitute the word "metal" for "wood," that quote basically describes my own experience with making handcrafted items to sell. Sometimes it does take me forever to make that first mark on the metal. The more expensive the metal, the longer it takes. (If you're waiting for me to make stamped items out of gold, please check back in ten years.) Sometimes I do mess up despite all my experience, stamping letters upside down or not striking the hammer hard enough to make a good impression. All you can do is try and be willing to start over if necessary. A good motto for life as well as jewelry making.